 100% GUARANTEE
 Description
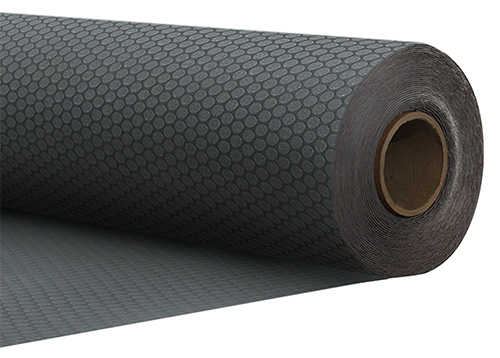
Great for RVs, Toy Haulers, Trailers, Steps, and even Garages
 Imagine that you have your arms full of dishes and silverware. You're quickly stepping out of your RV to get to the early cookout at the campground. It's a dew-kissed morning and the sun has just come up. Light is filtering through the trees sending rays of sun dancing in different directions. It's a picturesque morning. This is what the RV life is about. All the sudden, as you put your heel down on the bottom step of your camper, your foot slips, sending you flying up into the air. Your dishes, you, and your hopes of a pristine morning all come crashing down around you. "What happened?" you'll ask yourself as they take you to the ER because you landed the wrong way on a spork. What happened is you declined to put no-slip coin flooring down on your steps last summer, that's what.
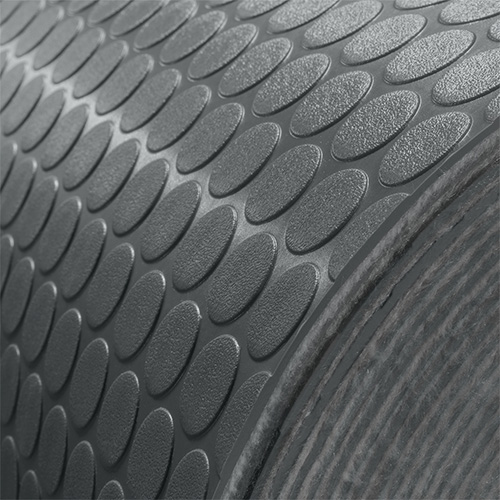 The coin/nickel pattern flooring from RecPro is an attractive must have for the flooring needs in your RV, camper, garage, or other location that requires no-slip covering. The RecPro coin/nickel flooring comes with our satis-traction guarantee. If you want to greatly decrease your chances of slipping and avoiding the scenario above, then installing coin flooring should be on the top of your priority list.
This attractive gray flooring is sold in five-foot sections that are 8' 6" wide so that you can easily customize them to fit your space. Want durability? This flooring avoids scarring, tearing, punctures, and staining. It's also easy to clean with most any household cleaner and surface scrubber. This industrial rubber flooring is also resistant to most chemicals and water and has a high melting point so that any dropped pots from your stove won't easily scar your floor!
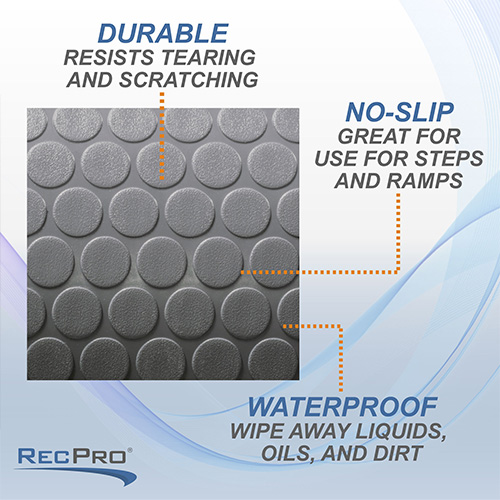
When it comes to putting slipping on the skids (or no-skids), coin/nickel flooring from RecPro should be your first choice.
Details:
- TPO Flooring
- 8' 6" Wide
- Thickness: 2.5 mm or 1/8"
- Color: Gray
- The coin/nickel pattern is a non-skid surface
- Resistant to sunlight, cold, heat and chemicals
- Waterproof
- Great for RVs, RV steps, trailers, toy-haulers, garages, and ramps
- Easy to clean
- Simple installation
- Resistant to tearing, peeling, or scratching
- Made in America
**ATTENTION** Only use when the temperature has been above 65° for 24 hrs.
*Any modification outside of manufacturer's suggested use (including but not limited to adding or removing mounting hardware, seat belts, brackets, clamps, etc.) immediately voids all warranties and waives liability from the manufacturer and all their subsidiaries*
**PLEASE NOTE** All fiberglass/Filon/flooring/Superflex cuts are obtained from a master roll. This means the ends will have a rough edge and will be longer than the purchased cut length. This is done so the customer may cut the piece to exact specifications. Customer will make final cuts.
***This flooring is not suitable for animals or livestock.***
| Length | Square Feet(@ 8-1/2' width) | Amount of Glue(Buckets) |
| 10' | 85 | 1 |
| 15' | 127.5 | 2 |
| 20' | 170 | 2 |
| 25' | 212.5 | 3 |
| 30' | 255 | 3 |
COIN AND DIAMOND FLOORING INSTALLATION INSTRUCTIONS
1. Make sure you have the proper PPE (personal protective equipment) before starting this (or any) DIY project. For this project, you will need: Cut-resistant gloves, safety glasses, proper attire (long-sleeved shirt and pants). This job will require cutting material and using liquid adhesive, and proper attire will help avoid cuts and getting adhesive on the skin.
2. Materials you will need for installation: Measuring tape, safety knife (retractable flooring knife), medium-knap roller, paint stick with roller head (3" to 9"), paint tray, paint tray liner, RecPro RP-128 RV and Marine Flooring Adhesive, and steel flooring roller.
3. You must clean and scour the surface of your substrate before application. Make sure after you scour the surface that you clean all particulate matter off of the floor for best adhesion.
4. Measure your area twice. Makes sure the numbers are correct before you cut your flooring to your exact specifications. The flooring you receive should have "slop" so that you have extra to trim down to size.
5. After you have prepped your floor and cut your coin/diamond flooring then you can apply the adhesive via one of two methods:
The direct pour: Direct pour method means that you will take the pail and pour (or use a tool/scoop to ladle out adhesive onto the substrate) in puddles. You then use the roller with the medium-knap cover and spread it all over the floor, evenly. While this method is faster, control of the amount of adhesive can vary and could cause the user not to have enough material for the entire project. Make sure the area is well-ventilated when applying.
Pan to the floor: Pour the adhesive into the paint pan (with pan liner) and then roll it on a section at a time. This method is preferred because the user can control the amount of adhesive used and avoid handling the pail and roller multiple times. Make sure the area is well-ventilated when applying.
6. Allow the glue to cure for a short time on the substrate (to penetrate the surface of the plywood) for best adhesion. Make sure adhesive is still "wet". Once cured (again, for a very short time), apply your coin or diamond flooring to the substrate. Lay the flooring out carefully and evenly. Once applied, use the steel roller to force the flooring down and remove any air pockets and wrinkles. Let sit for 24 hrs. before using.
