
Tips and Tricks for Carving Pumpkins
The month of October is flying by, which means it is just about time to start carving pumpkins (if you haven’t done so already). Young or old, pumpkin carving can be a fun and rewarding experience for all ages. This article will tell you how to pick the perfect pumpkin for carving and give some tips that will help you to make your jack-o-lantern come to life this Halloween season!
It All Starts With the Pumpkin
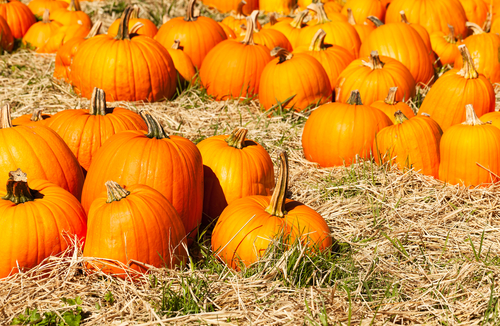
If you happen to choose a pumpkin from the patch that is past its prime, it will unfortunately be even worse by the time you get around to creating your jack-o-lantern masterpiece. To find a pumpkin that is ideal for carving, use your eyes and hands to examine any potential pumpkins for soft spots or gashes, as these are an indication that the pumpkin may be past its prime or damaged. The peduncle, or pumpkin stem, can also provide insight to the health of the pumpkin. If the stem is strong and green, the pumpkin is healthy and prime for carving. If the stem is flimsy and appears ready to break off at any moment, you should move on to finding a different pumpkin. When looking for a pumpkin to carve, look for one that is plump yet firm with a solid peduncle for best results.
Pumpkin carving experts warn against choosing pumpkins that have lots of ridges or a deformed shape. While these pumpkins may stick out in the pumpkin patch and be interesting to look at, their uneven surfaces can make it difficult to get smooth cuts. We’ll find out later that smooth cuts in your pumpkin have a large impact on the final appearance of your pumpkin. In addition to firm and plump, a good carving pumpkin will be smooth as well.
The shape of your pumpkin is up to you, and what is considered good for carving will depend on what you are going to carve! Do you need a pumpkin with a flattened surface for an intricate design? Or a few small found ones to create a halloween snowman pumpkin? You may find your inspiration based on what you see at the pumpkin patch. As long as the criteria mentioned above are met, you can choose whatever shape pumpkin you want for carving!
Pumpkin Prep Work
Pumpkins are famous for their orange rinds, which are thick and serve as the fruit’s protective outer layer. The inside of a pumpkin is filled with pale, oblong seeds and lots of pulp! If you’ve carved pumpkins before you are likely familiar with pulp, which is the stringy, fibery goo that engulfs the seeds inside the pumpkin.
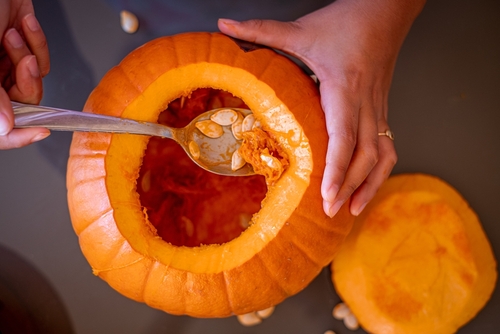
Before you get to carving, you must remove the seeds and pulp. Roll your sleeves up because it’s gonna get a little messy. The pulp doesn’t have much use other than as compost material, but the pumpkin seeds can be separated from the pulp, cleaned, and roasted in the oven for a tasty treat!
After the pumpkin guts have been removed, you can make your upcoming work easier by taking some time to thin out the pumpkin shell from the inside. For the spot that you will be carving, a rind width of about ¾”-1” inches thick is ideal. A thick rind can be difficult to carve, but too thin of a rind can lead to collapse later down the road. You can shave down the inside of the pumpkin using a serrated edge tool.
Draw First, Then Transfer
Even for the artistically inclined, sketching on the rounded edge of a globe-shaped pumpkin will be a bit tricky. For better success, draw your design ahead of time on a separate piece of paper. Make the design as simple or intricate as you feel comfortable, but remember that drawing with a pencil and carving with a knife require different levels of finesse. Use this experience to flex that creativity and try to go beyond the traditional triangle face!
Shading is a great way to add complexity and depth to your pumpkin carving! This involves scraping the outer skin of the pumpkin away to allow light to escape from the inside. Keep this in mind during your design phase and think of ways that it can be incorporated.
The drawing should be true to size so that you can transfer it directly onto your pumpkin. To transfer your drawing, place it over the pumpkin in the area you wish to carve, then using a pin or sewing needle, poke holes along all of the lines of your drawing. The holes should be substantial enough so that you can see them for tracing. Tracing your image is really just connecting the dots of your outline!
Be Patient & Accept Your Pumpkin’s Flaws
Prepare to spend anywhere between 2 and 4 hours carving your jack-o-lantern, more or less depending on the intricacy of your design. To make the experience a bit more enjoyable, put on some spooky party tunes or a frightening flick to play in the background. Carving or shaving pumpkin rind is not a quick process and really shouldn’t be rushed. Pumpkin carving accidents are not unheard of so be careful and use carving tools as intended; children should always be under parental supervision.
It’s also important to know that your pumpkin isn’t going to be perfect. The eyes of your character may be a bit uneven or your design may be lopsided, but that’s perfectly okay. Those little flaws are what gives your jack-o-lantern character, embrace them!
 Bring Your Jack-O-Lantern to Life
To fully appreciate your carved pumpkin, you need to light it up so that it can shine its design in the darkness. You can go old school with real flame or extend your pumpkins light by using battery-operated lights instead. A few tealight candles or a small string of Christmas lights is all you need to bring your jack-o-lantern to life this Halloween season!
Is pumpkin carving a yearly Halloween tradition in your house (or RV)? Do you prefer carving faces or other types of designs into your pumpkins? Let’s talk pumpkins in the comments section!
Recent Posts
-

4 Tips for Securing RV Furniture While Traveling | RecPro
How To Secure RV Furniture There are few things that beat going out on an adventure with an RV …Apr 11th 2024 -

Can You Put Regular Furniture in an RV?
Can you put regular furniture in an RV? Many new and old RV owners ask themselves this qu …Apr 8th 2024 -

Are RV Electric Fireplaces Safe
Being Safe in Your RV with an Electric Fireplace Safety is always going to be one of your highest …Apr 4th 2024 -

How To Install An RV Fireplace
A Warm Addition to Your On-Wheels: The DIY RV Fireplace Installation Guide Many RV enthusiasts ask …Apr 1st 2024 -

Essential Grilling Gear Every RVer Needs
Whether or not you consider yourself a pitmaster or grillmaster, if you’re out on the road with y …Mar 18th 2024 -

Fun and Interesting Places to Visit That Aren’t a National Park
One of the big destinations when RVing is to go to National Parks. You want to get back to nature, h …Mar 4th 2024